Dreamy Room Level 190 Walkthrough
Dreamy Room Level 190 presents a simple yet demanding challenge: align and place various elements with precision on a blank slate, consisting of a floor panel and two walls, to create a visually cohesive space.
Step-by-Step Guide
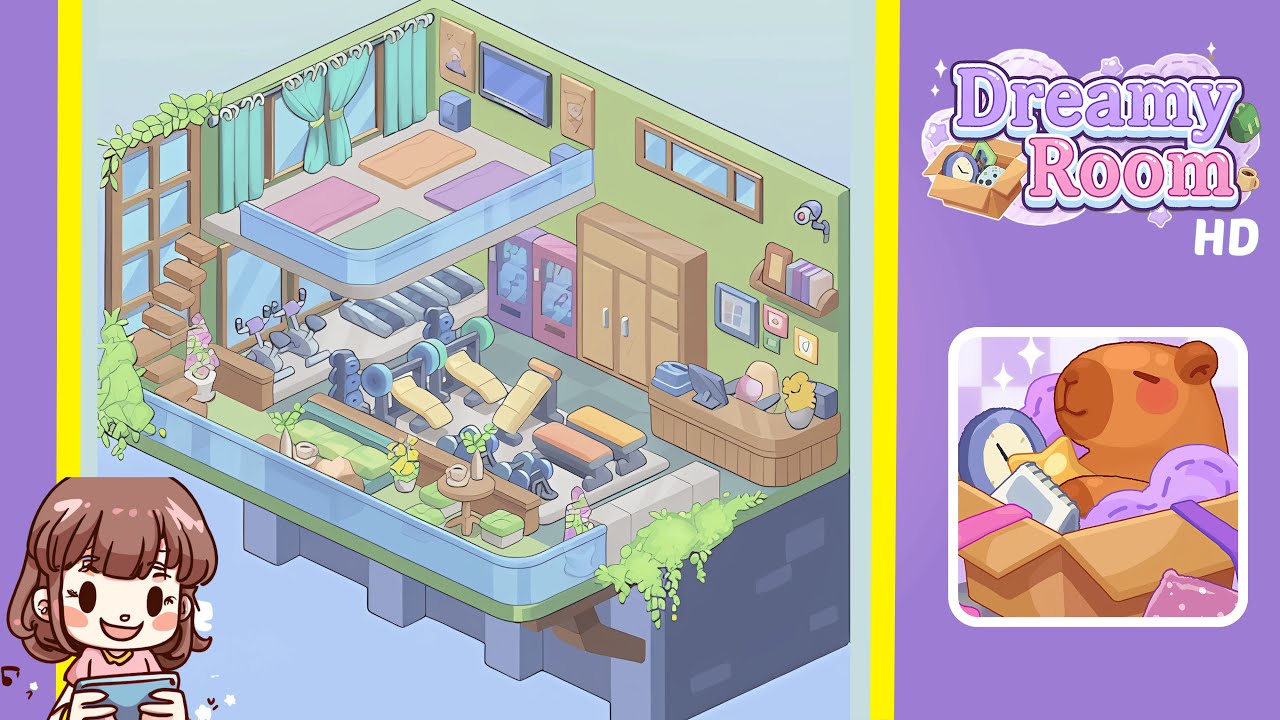
- Place the floor panel centrally and position the walls at the back and right. Achieve perfect alignment of the checkerboard grid for seamless wall placement at a 90-degree angle.
- Install the raised yoga platform in the back-left, surrounding it with a blue glass railing. Ensure alignment with the floor edge and utilize snapping guides for correct curvature.
- Arrange stationary bikes and treadmills under the platform and along the back wall. Align them with precision, maintaining even gaps and correct orientation.
- Set up the strength zone with weight benches and dumbbells along the right side, ensuring symmetrical placement and avoiding clipping.
- Organize the service corner with vending machines, a storage cabinet, and a reception desk. Ensure proper alignment and accessibility of all items.
- Complete the ambiance with windows, curtains, posters, a TV, a camera, and plants. Place these elements for optimal immersion and visual appeal.
Notes & Precautions
- Verify grid alignment for each object to maintain the overall layout.
- Use multiple camera angles to detect potential clipping issues with overlapping layers.
- Avoid placing heavy equipment near the platform's edge to prevent glitches.
- Pay attention to rotation controls; minor misplacements can affect immersion.
- Consider object spacing to prevent lag from overlapping elements.
- Manually save progress often and utilize the undo feature cautiously.
Tips & Tricks
- Utilize ghost previews for planning object placement without commitment.
- Start placement from the back walls to minimize obstruction of new items.
- Group similar objects before placing them to ensure uniform spacing and save time.
- Use undo history as a checklist for verifying the placement sequence.
- Apply filters for lighting effects to enhance pastel tones once objects are locked.
- Finish with details like plants and vines for a final cozy touch.