Dreamy Room Level 247 Walkthrough
This walkthrough guides you through achieving perfect placement for each item in Dreamy Room Level 247, highlighting the challenge of precision alignment within the game.
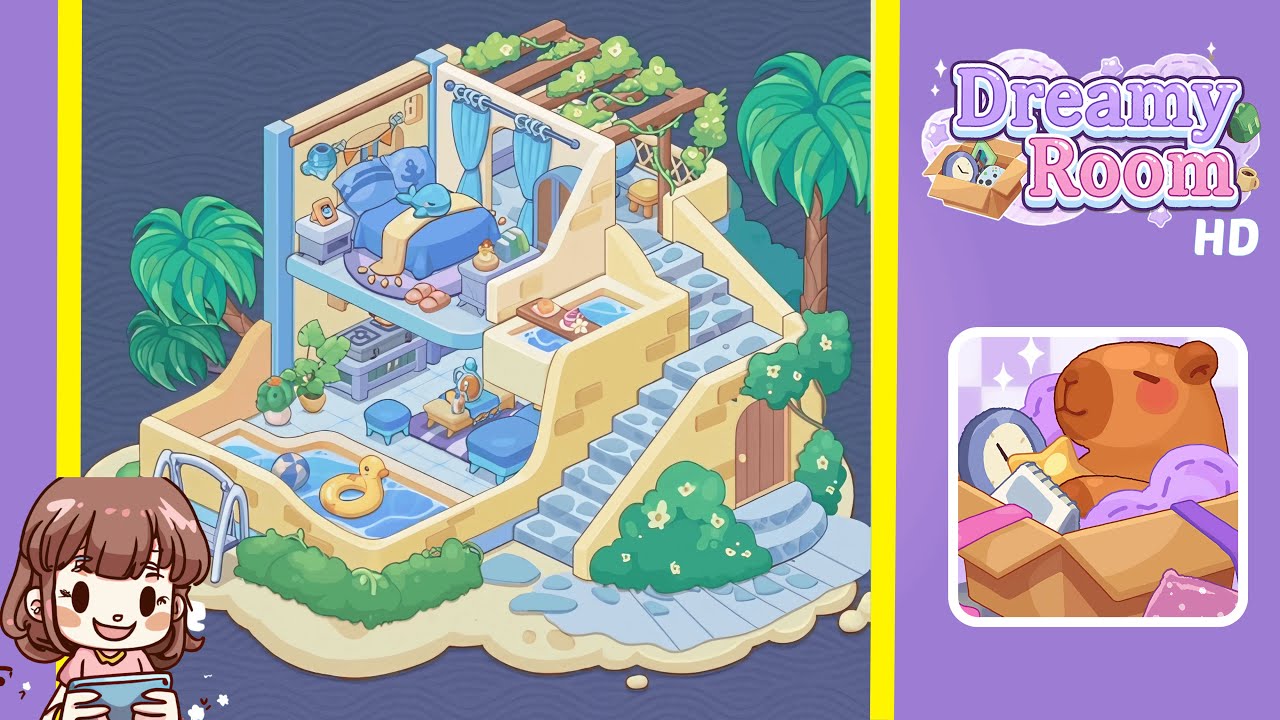
Step-by-Step Guide
- Position the twin-sized bed against the left back wall. Align the headboard with the floor's grid pattern, ensuring it sits between the two support columns.
- Place the white nightstand to the left of the bed. Add the orange-framed photo and blue ceramic teapot on top, aligning them with the grid lines.
- Hang the blue-and-orange bunting and a wall-mounted decorative teapot on the left wall. Align them precisely with hooks and grid intersections.
- Install the curtain rod and pale blue curtains on the right wall, ensuring they drape symmetrically and align with shadow cues.
- Place the bathtub and inflatable ring inside the bathroom alcove, ensuring proper clearance from walls and curtain lines.
- Position the pool ladder and swing frame on the lower left sandy area, aligning their posts with the platform edge and grid columns.
- Assemble the pergola on the upper right platform, methodically aligning wooden beams and vines with the grid layout.
- Place the round wooden stool under the pergola and stack three books with a candle near the bed while aligning them to the grid.
- Arrange the palm tree, bushes, and stone pathway on the sandy base. Ensure each plant and stone fits within its designated grid cell.
Notes & Precautions
- Grid Alignment: Align nearly every object to the hidden grid; shadows indicate a perfect snap.
- Overlap Prevention: Avoid overlap between objects since a few pixels can prevent correct registration.
- Rotation Limits: Objects snap only at fixed angles (0°, 90°); do not attempt free rotation.
- Wall Clearance: Ensure objects sit just off surfaces to avoid clipping when decorating.
Tips & Tricks
- Use the Grid Overlay: Toggle the grid hint to see precise snap points.
- Zoom In for Precision: Zoom in during placements to prevent micro-overlaps.
- Sequence Matters: Place large furniture before small accessories to avoid errors.
- Patience Pays Off: If an item won’t snap, try adjusting it slightly; it might only need a minor shift.