Dreamy Room Level 97 Walkthrough & Guide
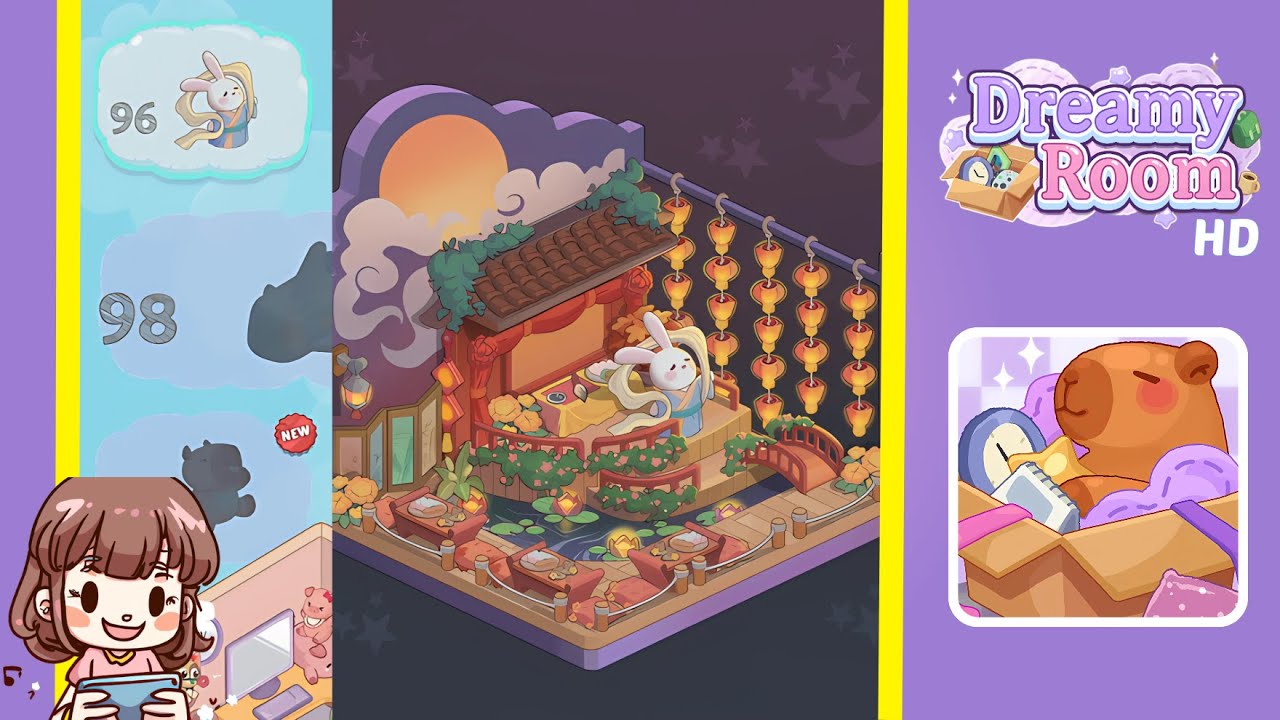
Welcome to the definitive Dreamy Room Level 97 walkthrough. In this guide, you'll learn how to transform the empty space into the vibrant, lantern-lit pavilion scene shown in the completed image. Every placement matters: the main challenge is discovering exactly where each object belongs. Follow these step-by-step instructions to successfully decorate the room and recreate the tranquil moonlit festival setting with its cloud-shaped backdrop, floating lotus pond, glowing lanterns, and charming rabbit figure.
Step-by-Step Guide
- Place the cloud-shaped backdrop and sun disc in the left background. Start by selecting the large cloud-shaped backdrop from your inventory and align its scalloped edge with the upper rim of the room’s interior wall, pressing it into place at floor level. Then, position the circular sun disc directly behind the cloud silhouette, centering it in the semicircular opening to cast a warm gradient over the left section.
- Place the main wooden pavilion floor panel and curved stair step in the center. Select the large rectangular deck with purple edging and move it to the center of the room floor, shifting it slightly toward the right wall. Ensure that the panel’s front edge aligns evenly with the room’s front corner posts. Then choose the matching curved stair step and attach it to the front edge of the pavilion deck.
- Place the ornate tiled roof and green vine garland above the pavilion. Position the brown-tiled roof piece above the pavilion deck, ensuring it overhangs evenly on both sides and sits directly on the top edge of the deck’s rear wall. Drape the green vine garland along the front lip of the roof, winding the foliage around the amber tiles.
- Place red draperies and tassels on the pavilion front. Hang the rich red drapery swags from the roof’s underside, securing the fabric so that each side flares outward over the deck posts. Attach the decorative tassels to the bottom corners of the drapes, letting them dangle just above the deck floor.
- Place the bamboo folding screen and standing lantern on the left interior. Rotate the three-panel bamboo folding screen 90 degrees and slide it into the back-left corner of the pavilion deck. Set the tall standing lantern with its soft yellow glow in front of the folding screen, slightly toward the room interior.
- Place the string of hanging lanterns along the right wall. Attach the long metal rod accessory horizontally to the right interior wall at mid-height. Hook each of the eight glowing lanterns over the rod, spacing them evenly. Adjust their vertical position to create a golden backdrop.
- Place the small table with tea set on the pavilion deck. Position the low rectangular table draped in a golden-yellow cloth just left of center on the deck floor. Place the porcelain inkstone and paint brush set near the back edge of the table, and add the ceramic tea cup at the front corner.
- Place the lotus pond, lily pads, and floating lantern flowers in front of the pavilion. Drag the dark water pond base so that its edge nearly touches the pavilion deck front. Center the pond, then drop the clusters of green lily pads into their matching slots on the water’s surface. Position the glowing lotus lantern flowers among the pads.
- Place the wooden chairs with red cushions and snack trays around the pond. Set two wooden chairs with plush red cushions symmetrically on each side of the pond, aligning them just behind the rope-fenced walkway posts. Position a round snack tray on each chair seat, lightly rotating so the treats face the pavilion.
- Place the white rabbit character in flowing robes on the pavilion deck. Select the white rabbit figurine in pastel hanfu robes, rotate it 45 degrees to face the left, and place it on the right side of the pavilion deck. Position it with its front paws gently on the railing under the tiled roof’s edge.
Notes & Precautions
- Always rotate and fine-tune item orientation to ensure clean lines and prevent overlap.
- Keep an eye on layering order—background elements must be locked before adding foreground props.
- Use the hint tool sparingly, as it reveals accurate placements but costs in-game currency.
- There is no timer, so take your time to adjust each object’s position for a satisfying final layout.
- Save your progress before moving large structures to avoid accidental resets.
Tips & Tricks
- Begin by placing large structural items first to create a solid framework before adding details.
- Use grid-snapping and the rotate tool’s fine-tune mode to align symmetrical decorations perfectly.
- Group lanterns and chairs into mini-sets, then duplicate placements on each side by tapping “copy” and mirroring horizontally.
- Zoom in on key areas to drag smaller items like the inkstone or snack trays with pixel-level precision.
- If you get stuck, revisit earlier placements to ensure foundational pieces didn’t shift.