Dreamy Room Level 260 Walkthrough
Welcome to the Dreamy Room Level 260 walkthrough. This guide will help you navigate the nuances of creating a whimsical space filled with vibrant decor and engaging attractions.
Step-by-Step Guide
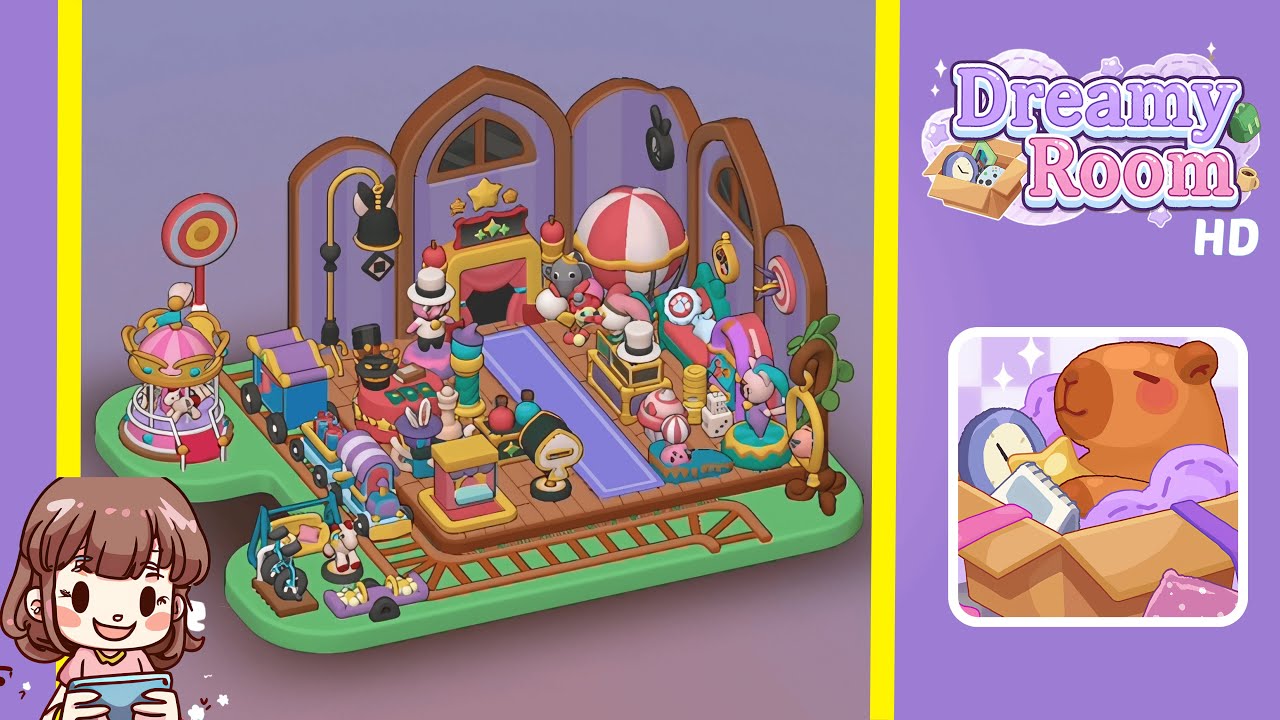
- Place the main background and flooring: Start by installing the arched triple windows along the back wall, ensuring the middle window is perfectly centered. Align each arched frame with the floor edges. Install the warm brown wooden flooring with a green puzzle-shaped extension covering the front and sides, essential for housing rides and play equipment. Ensure window panels have the striped lavender interior facing the room to set the tone for Dreamy Room Level 260.
- Position the large amusement rides on the left: Place the pink-and-gold carousel on the far-left green extension, with its entrance facing slightly forward. Next to it, align the blue-and-purple toy train parallel to the room’s left wall. Maintain wide spacing for smaller decorations later.
- Fill the right-hand section with plush and arcade elements: In the right-hand green extension, position the large brown bear cutout at the far end, angled to face viewers. Place the pink-and-teal bounce platform in front, add the pink-and-white candy stand with a cash register beside it, and attach the circular target and dart decorations to the far right wall.
- Add the central play features: On the central wooden floor, set up the black magician’s hat stand near the left window, flanked by a tall black lamp post. Place the cotton candy display with a striped umbrella stand surrounded by plush animals. Position the yellow coin-operated binocular machine along the right center, facing outward.
- Install the smaller toys and decorative details: Distribute miniature swings, pedal bikes, gumball stands, popcorn barrels, and star plaques evenly across the remaining space. Fill gaps with stuffed animals, colorful cones, and wall hangings. Finish by placing the tiny train track at the front of the green base.
Notes & Precautions
- Always match object orientation to the reference to maintain the room’s symmetry.
- Keep walkways clear to avoid a cluttered appearance.
- Ensure wall-mounted decorations are at consistent heights.
- The green floor extension serves as a guide for placing rides and activity stations.
- Save progress regularly to avoid extensive rearranging if errors occur.
Tips & Tricks
- Work from back to front to keep the view clear for later placements.
- Symmetrical placement of large rides balances and immerses the space.
- Creating color-coordinated zones enhances cohesiveness.
- Zoom in if sizes appear off to correct alignment errors.
- Use smaller toys to fill empty spaces and maintain a natural flow.